If you’ve ever wondered how to track your website traffic or understand your audience better, then Google Analytics is the tool for you. It helps you see who visits your website, what pages they like, and how they interact with your content.

This guide will take you step by step, making it easy enough for a beginner—or even a grade 5 student—to understand. By the end, you’ll know exactly how to set up Google Analytics and start tracking your website like a pro.
Table of Contents
- What is Google Analytics and Why It Matters
- Creating a Google Analytics Account
- Setting Up a Property
- Installing the Tracking Code on Your Website
- Understanding the Google Analytics Dashboard
- Setting Goals and Conversions
- Linking Google Analytics to Google Search Console
- Tracking Events and User Interactions
- Creating Custom Reports and Dashboards
- Conclusion: Mastering Google Analytics for Beginners
What is Google Analytics and Why It Matters
Google Analytics is a free tool provided by Google that helps you track and analyze website traffic. Whether you have a blog, e-commerce store, or business website, understanding how visitors behave is essential.
Why Use Google Analytics?
- Track Website Traffic: See how many people visit your site every day.
- Understand Your Audience: Know where your visitors come from, their age, gender, and interests.
- Measure Marketing Efforts: See which campaigns, ads, or social media posts are working.
- Improve Your Website: Discover which pages perform best and which need improvement.
Pro Tip: Without Google Analytics, your website is like a car driving in the dark—you won’t know where you’re going or how fast you’re moving.
Creating a Google Analytics Account
Step 1: Sign Up
- Go to Google Analytics.
- Click “Start Measuring”.
- Sign in with your Google account.
Step 2: Set Up Your Account
- Enter an Account Name (e.g., your business or website name).
- Choose data sharing settings (optional but recommended to improve insights).
- Click Next to continue.
Setting Up a Property
A Property in Google Analytics represents the website or app you want to track.
Step 1: Add Property Details
- Enter Property Name (e.g., My Website).
- Select your Reporting Time Zone and Currency.
- Click Next.
Step 2: Add Business Information
- Choose Industry Category (e.g., e-commerce, education, or personal blog).
- Select your Business Size.
- Click Create.
Step 3: Accept the Terms
- Read and accept Google Analytics Terms of Service.
- Choose whether to allow data sharing with Google products.
Congratulations! Your property is now ready.
Installing the Tracking Code on Your Website
To start tracking your website, you need to install the Google Analytics tracking code.
Step 1: Get Your Tracking Code
- Go to Admin → Property → Data Streams → Web.
- Click on your website.
- Copy the Global Site Tag (gtag.js) code.
Step 2: Add the Tracking Code to Your Website
- Paste the code in the header section of your website, before the
</head>tag. - If you use platforms like WordPress, Shopify, or Wix, there are plugins or built-in options to add the tracking code.
Step 3: Verify Tracking
- Go to Realtime → Overview in Google Analytics.
- Open your website in another tab.
- You should see active users appear, confirming that the tracking is working.
Tip: Double-check the code on every page to ensure accurate data collection.
Understanding the Google Analytics Dashboard
Once installed, Google Analytics will start showing data. Here’s what you need to know:
Key Sections of the Dashboard
- Realtime: See current visitors on your website.
- Audience: Learn about visitors’ demographics, interests, and devices.
- Acquisition: Find out how visitors arrive at your website (social media, search engines, direct).
- Behavior: Analyze how visitors interact with your content (pages visited, time spent, bounce rate).
- Conversions: Track goals like sales, sign-ups, or downloads.
Important Metrics to Know
- Sessions: Number of visits to your website.
- Users: Unique visitors to your website.
- Pageviews: Total number of pages viewed.
- Bounce Rate: Percentage of visitors who leave after viewing one page.
- Average Session Duration: Average time visitors spend on your website.
Pro Tip: Focus on metrics that align with your website goals, not just vanity metrics.
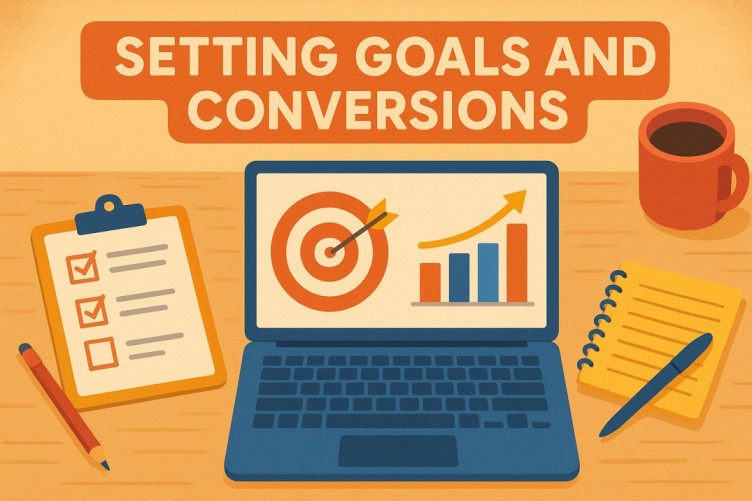
Setting Goals and Conversions
Why Set Goals?
Goals in Google Analytics help you track specific actions, such as:
- Newsletter sign-ups
- Product purchases
- Contact form submissions
- Video plays
Step 1: Go to Admin → Goals
- Click + New Goal.
- Choose a template or custom goal.
- Set goal details (e.g., destination URL for a thank-you page).
- Click Save.
Step 2: Monitor Goal Conversions
- Go to Conversions → Goals → Overview.
- Track how many visitors completed your goals.
- Adjust marketing strategies based on goal performance.
Linking Google Analytics to Google Search Console
Google Search Console provides insights into how your website performs in Google search.
Step 1: Sign Up for Google Search Console
- Go to Google Search Console.
- Add your website and verify ownership.
Step 2: Link to Google Analytics
- Go to Admin → Property → All Products → Search Console.
- Click Link Search Console.
- Select your website and save.
Benefit: Now you can see which keywords drive traffic and how users behave after visiting your site.
Tracking Events and User Interactions
Events allow you to track specific actions on your website, like:
- Button clicks
- Video plays
- File downloads
Step 1: Enable Event Tracking
- Go to Admin → Data Streams → Web → Enhanced Measurement.
- Toggle on Track interactions like scrolls, outbound clicks, and video engagement.
Step 2: Monitor Events
- Go to Behavior → Events → Overview.
- Analyze which actions users take most frequently.
Pro Tip: Event tracking helps you understand user behavior beyond pageviews, making your insights more actionable.
Creating Custom Reports and Dashboards
Custom reports allow you to see all important metrics in one place.
Step 1: Go to Customization → Dashboards
- Click + New Dashboard.
- Choose Blank Canvas or Starter Dashboard.
Step 2: Add Widgets
- Add metrics like sessions, conversions, bounce rate, and traffic sources.
- Choose chart type (line, bar, pie).
- Save and share with your team.
Step 3: Schedule Reports
- Automate reports weekly or monthly.
- Keep track of trends and performance over time.
Tip: Custom dashboards save time and keep your most important data front and center.
Advanced Tips for Using Google Analytics
Once you’ve set up Google Analytics, there are advanced strategies that can help you get even more insights from your website traffic.
1. Segment Your Audience
Segmentation allows you to break down visitors into groups for better understanding.
- By Demographics: Age, gender, location
- By Behavior: New vs. returning visitors, pages visited
- By Traffic Source: Organic search, social media, paid ads
How to Create a Segment
- Go to Audience → Overview → Add Segment
- Choose a predefined segment or create a custom segment
- Apply the segment to your reports to see detailed insights
Pro Tip: Segments help you tailor marketing strategies to specific visitor groups.
2. Use UTM Parameters to Track Campaigns
UTM parameters are tiny codes added to URLs to track specific campaigns.
Key UTM Parameters
- utm_source: Where traffic comes from (e.g., facebook, newsletter)
- utm_medium: The type of campaign (e.g., social, email, CPC)
- utm_campaign: Campaign name (e.g., spring_sale)
How to Use UTM Parameters
- Use Google’s Campaign URL Builder
- Add the UTM-tagged link to your ads, social posts, or email campaigns
- Monitor performance in Acquisition → Campaigns → All Campaigns
Benefit: You’ll know exactly which campaigns drive traffic and conversions.
3. Set Up E-Commerce Tracking
If you run an online store, e-commerce tracking is a must. It helps track sales, revenue, and product performance.
Step 1: Enable E-Commerce
- Go to Admin → View → E-commerce Settings
- Toggle Enable E-commerce and Enable Enhanced E-commerce Reporting
Step 2: Add E-Commerce Code to Your Site
- Install tracking on product pages, checkout pages, and confirmation pages
- Use platforms like Shopify, WooCommerce, or Magento, which have built-in support
Step 3: Analyze Sales Data
- Go to Conversions → E-commerce → Overview
- Track total revenue, conversion rate, average order value, and top products
Tip: Enhanced E-commerce shows user behavior before purchase, helping you optimize the sales funnel.
4. Monitor Site Speed and User Experience
Site speed affects user satisfaction and SEO rankings.
How to Check Site Speed
- Go to Behavior → Site Speed → Overview
- Check average page load time, server response time, and slowest pages
Improve Performance
- Compress images
- Use caching plugins
- Minimize unnecessary scripts
Pro Tip: A faster website reduces bounce rate and improves conversions.
5. Track Conversions Across Multiple Channels
Multi-channel funnels show how different marketing channels work together.
Key Reports
- Assisted Conversions: Shows which channels helped conversions indirectly
- Top Conversion Paths: Reveals sequences of interactions leading to goals
- Time Lag: Understand how long it takes for visitors to convert
Why it matters: Even if social media doesn’t lead directly to a sale, it may assist in conversions later.
6. Use Custom Alerts
Custom alerts help you stay on top of important changes in your website traffic.
How to Set Up Alerts
- Go to Admin → View → Custom Alerts
- Click + New Alert
- Define alert conditions, such as:
- Traffic drops by 50%
- Conversion rate increases by 20%
- Receive notifications via email
Benefit: Alerts help you quickly react to sudden changes in performance.
7. Integrate Google Analytics with Other Tools
Enhance your insights by linking Google Analytics with other platforms:
- Google Ads: Track paid campaign performance
- Google Tag Manager: Easily manage tags and tracking codes
- CRM Tools (HubSpot, Salesforce): Connect marketing and sales data
- Social Media Tools (Hootsuite, Buffer): Analyze social media ROI
Pro Tip: Integration gives a 360-degree view of marketing performance.
Troubleshooting Common Google Analytics Issues
Even beginners encounter problems. Here’s how to solve them:
- No Data Appears: Check if the tracking code is correctly installed.
- Data is Delayed: Analytics can take 24–48 hours to show detailed reports.
- Referral Spam: Use filters to block fake traffic from skewing your data.
- Multiple Tracking Codes: Ensure only one code is installed per page.
- Cross-Domain Tracking Issues: Use Google Tag Manager for accurate tracking.
Tip: Regularly audit your tracking setup to ensure accurate and reliable data.
Analyzing Google Analytics Data
Data is only useful when you know how to analyze it.
Step 1: Check Traffic Sources
- Go to Acquisition → All Traffic → Channels
- See which sources bring the most visitors:
- Organic Search
- Direct
- Social Media
- Paid Ads
Step 2: Measure Engagement
- Metrics to watch:
- Bounce rate
- Average session duration
- Pages per session
Step 3: Evaluate Conversions
- Track which channels and campaigns drive goal completions
- Adjust strategies based on conversion performance
Pro Tip: Focus on traffic quality, not just quantity. High traffic with low engagement is less valuable.
Mastering Google Analytics for Beginners
By following this step-by-step guide, you now know how to:
- Set up Google Analytics from scratch
- Install the tracking code on any website
- Understand key metrics and dashboards
- Set goals and track conversions
- Use advanced tools like UTM parameters, e-commerce tracking, and multi-channel funnels
Tips for Ongoing Success
- Review reports weekly or monthly
- Continuously test and optimize your website and campaigns
- Stay updated with Google Analytics updates and features
- Use insights to improve marketing ROI and website performance
Conclusion
Google Analytics is a powerful tool for anyone who wants to grow their website or online business. With proper setup, tracking, and analysis, you can make data-driven decisions that improve traffic, engagement, and conversions.
Remember: it’s not enough to just install Google Analytics. The real power comes from understanding the data and taking action.
Pro Tip: Start with the basics, then gradually explore advanced features. Over time, you’ll become a Google Analytics master, capable of optimizing your website and marketing efforts like a pro.